
前言
上次跟大家簡介了 Eigen 這個可以用來做線性代數運算的 open source library,讓大家有動手實作、開始玩到東西的感覺。今天要延續動手實作的精神,跟大家介紹一下該怎麼把幾張 RGB-D 影像拼接成 point cloud,接下來就讓我們一起玩玩吧!
參考資料來源
這次的 data(包含 RGB 影像跟 Depth Map) 等等都是來自於 slambook 的 ch5,有這些資料真的超讚的,不然自己光要產生這些資料就得花一些時間,還要有硬體,比較難快速地上手。
核心概念
我們擁有的 data 是 RGB-D 感測器在 5 個不同的 pose 底下拍到的影像,利用相機的內部參數將一組 RGB-D 影像中的像素對應回 3D 相機座標系下的 point cloud,然後再利用各組圖的 camera pose,將各組 point cloud 對應到同一個世界座標系下,就能組合出地圖。
其中 pose.txt 儲存的格式是平移向量加上旋轉四元數:
$[x, y, z, q_x, q_y, q_z, q_w]$
如果你對內部參數和外部參數的概念不熟,網路上有頗多資源,個人覺得延伸閱讀 1 的講解算是十分清楚的,推薦去看看!
實作
基本函式庫安裝
首先要安裝 OpenCV2,因為待會寫程式需要讀取影像,因為 OpenCV 也是一個 cmake project,步驟比較複雜一些,可以直接看看官方安裝頁面。
然後是安裝 PCL:
sudo add-apt-repository ppa:v-launchpad-jochen-sprickerhof-de/pcl
sudo apt-get update
sudo apt-get install libpcl-all
程式碼
接下來就是程式碼啦,其實你可以先跑起來再慢慢理解:
#include <iostream>
#include <fstream>
using namespace std;

#include <opencv2/core/core.hpp>
#include <opencv2/highgui/highgui.hpp>
#include <Eigen/Geometry>
#include <boost/format.hpp>  // for formating strings
#include <pcl/point_types.h>
#include <pcl/io/pcd_io.h>
#include <pcl/visualization/pcl_visualizer.h>

int main( int argc, char** argv )
{
    vector<cv::Mat> colorImgs, depthImgs;    // 彩色影像和深度影像
    vector<Eigen::Isometry3d> poses;         // 相機 pose

    ifstream fin("./pose.txt");
    if (!fin)
    {
        cerr << "必須在有pose.txt的目錄下執行此程式" << endl;
        return 1;
    }

    // 讀取彩色影像、深度影像以及對應的相機 pose
    for ( int i=0; i<5; i++ )
    {
        boost::format fmt( "./%s/%d.%s" );
        colorImgs.push_back( cv::imread( (fmt%"color"%(i+1)%"png").str() ));
        depthImgs.push_back( cv::imread( (fmt%"depth"%(i+1)%"pgm").str(), -1 ));

        double data[7] = {0};
        for ( auto& d:data )
            fin>>d;
        Eigen::Quaterniond q( data[6], data[3], data[4], data[5] );
        Eigen::Isometry3d T(q);
        T.pretranslate( Eigen::Vector3d( data[0], data[1], data[2] ));
        poses.push_back( T );
    }

    // 計算 point cloud 並接起來
    // 指定相機內部參數
    double cx = 325.5;
    double cy = 253.5;
    double fx = 518.0;
    double fy = 519.0;
    double depthScale = 1000.0;

    cout << "正在將影像轉換為 point cloud ..." << endl;

    // 定義 point cloud 使用的格式:這邊用的是XYZRGB
    typedef pcl::PointXYZRGB PointT;
    typedef pcl::PointCloud<PointT> PointCloud;

    PointCloud::Ptr pointCloud( new PointCloud );
    for ( int i=0; i<5; i++ )
    {
        cv::Mat color = colorImgs[i];
        cv::Mat depth = depthImgs[i];
        Eigen::Isometry3d T = poses[i];
        for ( int v=0; v<color.rows; v++ )
            for ( int u=0; u<color.cols; u++ )
            {
                //使用內部參數與深度值算出相機座標系下的 point cloud
                unsigned int d = depth.ptr<unsigned short> ( v )[u]; // 深度值
                if ( d==0 ) continue; // 深度為0表示沒有量到
                Eigen::Vector3d point;
                point[2] = double(d)/depthScale;
                point[0] = (u-cx)*point[2]/fx;
                point[1] = (v-cy)*point[2]/fy;

                //用外部參數轉換到世界座標系底下
             Eigen::Vector3d pointWorld = T*point;
                PointT p ;
                p.x = pointWorld[0];
                p.y = pointWorld[1];
                p.z = pointWorld[2];
                p.b = color.data[ v*color.step+u*color.channels() ];
                p.g = color.data[ v*color.step+u*color.channels()+1 ];
                p.r = color.data[ v*color.step+u*color.channels()+2 ];
                pointCloud->points.push_back( p );
            }
    }

    //儲存 point cloud
    pointCloud->is_dense = false;
    cout << "There are total " << pointCloud->size() << " points in the map.pcd." <<endl;
    pcl::io::savePCDFileBinary("map.pcd", *pointCloud );
    return 0;
}
編譯與執行
接下來就是編譯啦:
mkdir build
cd build
cmake ..
make
mv joinMap ../
cd ..
編譯完就可以執行並觀察產生的 map.pcd 檔了。
./joinMap
pcd_viewer map.pcd
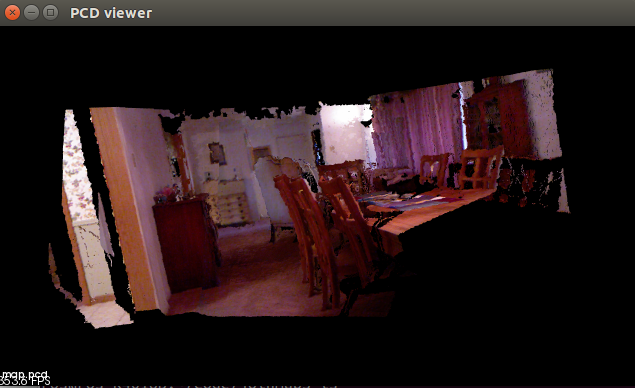
一開始開啟 pcd_viewer ,會看到所有的 pointcloud都是同一個顏色的,要按 5 才能進入 RGB 的模式,如果你有正確執行,應該會看到如下面這張圖的效果:
總結
這次很簡單地跟大家介紹了該怎麼使用相機的內部參數和外部參數,推得每個 pixel 在世界座標系中的位置,進而產生出 pointcloud,大家在有空時也不妨思考一下,我們是怎麼認識這個三維世界的,為何我們不需要知道每個 pointcloud 的確切位置就可以做好生活中的各項事情呢?
我們每天都在使用很多高級的演算法、完成很多複雜的事情,如果能將這些演算法實作於機器人,那就可以造出超級高級的機器人了,不過這一點也不容易就是了。
延伸閱讀
關於作者:
@pojenlai 演算法工程師,對機器人跟電腦視覺有少許研究,最近在學習看清事物的本質與改進自己的觀念


